设计师和绘画爱好者有福利了!!看到一张漂亮的图片,有没有想要把它的配色方案拿下来的冲动呢,呵呵我经常的。强大的photoshop会帮助我们搞定一切。看看我怎么用ps操作的!!!你也可以的,以后再也不用为配色烦恼了,呵呵。
首先呢,你得有一张自己喜欢的图片,我的是这张。蛮漂亮的,就是她了!!

然后呢,我们【ctrl+shift+alt+s】 命令 或者【文件】->【存储为web所用格式..】导出图片。

在导出界面上有【颜色表】这个选项卡,展开小三角,里面有【存储颜色表】这个命令,看图上的标示。
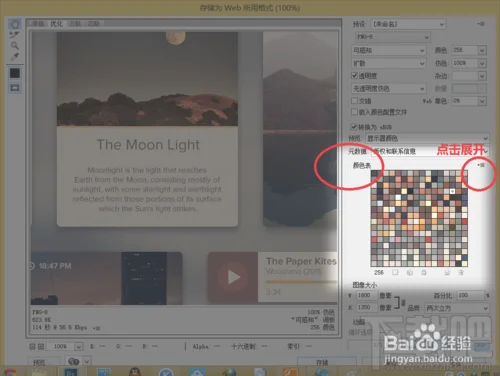

这样就可以到我们想要的颜色表了,文件格式.act

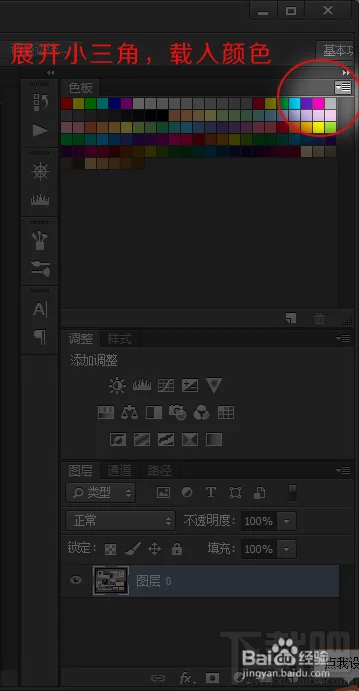
最后我们双击这个文件,Photoshop就会自动为我们在如这个颜色表。或者我们可以选择【色板】->【载入色板】这个命令。